Sándwiches de miga caseros: The Perfect Comfort Food
The aroma of freshly baked bread wafts through the air as my grandmother carefully layers each slice, her hands moving with practiced ease. The soft crunch of the crust breaking under pressure before giving way to a burst of flavors is a memory I cherish deeply. Those afternoons spent in her cozy kitchen, surrounded by laughter and the clatter of utensils, were filled with the irresistible making of sándwiches de miga caseros. These sandwiches not only represent comfort food to me but also a connection to heritage and family traditions, eagerly waiting to be refreshed with every bite. You may also find Classic Soft Pretzels Easy Homemade Recipe useful.
In this article, we’ll discover the joys of crafting these delicious little sandwiches, exploring everything from their history to tips for the ultimate sándwiches de miga. Perfect for gatherings, picnics, or simply satisfying a craving, they are a delightful treat that will transport you back to fond memories of family feasts. You may also find Delicious Classic Veal Piccata Recipe With White Wine Sauce useful.
Why You’ll Love This Recipe
- They’re incredibly versatile with endless fillings to suit any palate, from savory to sweet.
- Preparing them takes only about 30 minutes, making them a quick option for lunch or snacks.
- The sandwiches remain fresh and delicious for hours, making them perfect for parties or picnics.
- You’ll impress your family and friends with gourmet-style sandwiches made right at home.
- The soft texture of the bread combined with various fillings creates a delightful eating experience.
Ingredients You’ll Need
- 12 slices of white or whole grain bread (soft bread yields a better texture)
- 4 oz cream cheese (adds creaminess and helps bind fillings)
- 4 oz sliced ham (choose quality meat for a richer flavor)
- 4 oz sliced cheese (your choice, but a mild cheese works best)
- 1/4 cup pickles (adds a tangy crunch)
- 1/4 cup sliced bell peppers (for freshness and color)
- Fresh herbs, such as parsley or cilantro, for garnish (adds a pop of flavor)
- Butter or mayonnaise for spreading (enhances moisture and flavor).
How to Make Sándwiches de Miga Caseros (Step-by-Step)
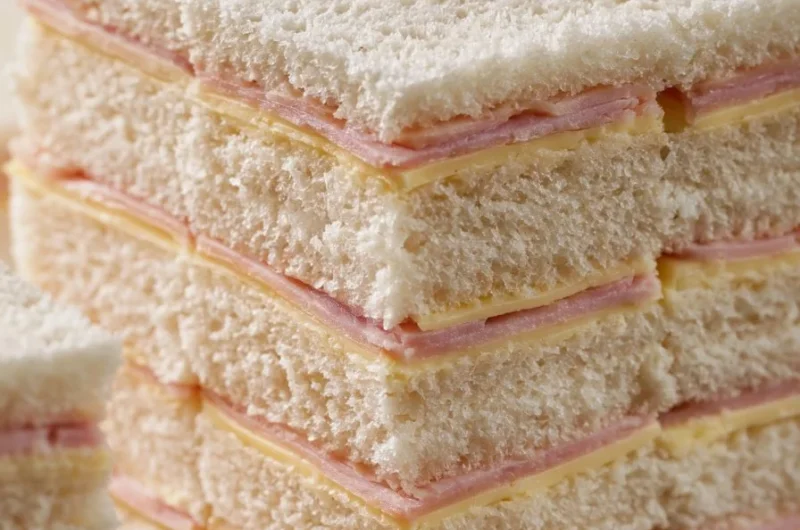
- Preparation: Begin by laying out your slices of bread on a clean surface. If preferred, trim the crusts for a neater presentation.
- Spreading Cream Cheese: Evenly spread cream cheese on one side of each bread slice. This serves as a delightful base that adds flavor and moisture.
- Layering Ingredients: On half of the slices, add the ham and cheese in an even layer. For an extra crunch, sprinkle pickles and bell peppers on top.
- Assembling Sandwiches: Place the remaining bread slices (cream cheese side down) on top of the filled slices to form sandwiches.
- Slice and Arrange: With a sharp knife, cut each sandwich into quarters or triangles, depending on your preference. Arrange them on a serving plate.
- Garnishing: For an added touch, sprinkle fresh herbs on top of the assembled mini sandwiches before serving.
- Serving: These sandwiches are best served immediately, but they hold up well for a few hours. Cover with a damp cloth if storing for longer.
Tips for the Best Results
- Make sure the ingredients are fresh; this will elevate the overall taste of your sandwiches.
- Chill the assembled sandwiches for about 15 minutes before serving to meld the flavors.
- Experiment with different fillings such as roasted vegetables or various meats to customize to your liking.
Common Mistakes to Avoid
- Using stale bread: Old bread can ruin the texture of your sandwiches. Always use fresh bread.
- Overstuffing: It’s tempting to add too many fillings, but this can lead to messy sandwiches. Aim for a balanced filling-to-bread ratio.
- Not cutting properly: If the sandwiches aren’t cut evenly, they won’t look appealing. Use a sharp knife to ensure clean edges.
Variations
- Mediterranean Twist: Substitute ham with roasted vegetables and add feta cheese for a flavorful alternative.
- Caprese Style: Use fresh tomatoes, mozzarella, and basil for a refreshing take on the traditional recipe.
- Sweet Delight: For a different approach, try nut butter and banana slices in between the bread for a delicious sweet treat.
Storage and Reheating
- Store any leftover sándwiches in an airtight container in the fridge for up to 2 days.
- Reheat by placing them in a lightly warmed oven for a few minutes to regain some crunch and warmth.
Frequently Asked Questions
-
Can I use different types of bread?
Yes, you can use rye, sourdough, or even gluten-free bread to suit your dietary needs. You may also find Delicious Crispy Eggplant Parmesan Recipe Youll Love useful. -
Can I make these ahead of time?
Absolutely! Prepare them a few hours in advance and store them covered until you’re ready to serve. -
What fillings can I use besides ham and cheese?
Feel free to get creative! Many people enjoy using tuna salad, chicken salad, or even various vegetables.
Final Thoughts
When I think back to my grandmother’s kitchen, the memory of those delightful sándwiches de miga caseros brings warmth to my heart. The process of crafting these sandwiches is more than just making a meal; it’s about sharing love and tradition with each layer. I invite you to embrace these moments in your own kitchen and enjoy a taste of history with each delicious bite.
Conclusion
The art of making sándwiches de miga caseros is not only about the flavors but also the connections we build with family and friends. If you’re looking for more inspiration, you can check out 5 recetas de Sándwich de Miga caseros – Paulina Cocina or explore a delicious option at Sándwiches de miga caseros – Cocineros Argentinos. Enjoy creating your delicious memory!